
If you like to spend time on the patio, an awning will protect you from the sun and rain better than an umbrella. Whether it’s the angle of inclination, the type of fixing or the type of cleat: this guide will take you through all the assembly steps that an awning installer carries out, from the correct dimensions to the installation of the awning.
The advantages of hiring an awning fitter.
When the hot midday sun shines through the doors, a straight point awning is often the only way to protect yourself from the sun’s rays. Intense sunlight can make it impossible to use the terrace for dining or entertaining friends.
An umbrella provides cooling shade, but most models cannot withstand even weak winds.
This is when you should enlist the help of an awning installer, as an extendable awning can protect your home. It is the perfect sun protection and can be quickly extended with a hand crank or an electric control.
Thanks to the awning fitter, you no longer need a sunshade and you no longer have to darken your windows.
Work steps to be followed by an awning fitter.
- Prepare installation and control material.
- Take measurements and determine the position of the external awning.
- Attach the awning brackets to the wall.
- Attach awning.
Installing an awning: step by step.
1. Prepare the installation and inspection material.
- After unpacking, the awning fitter must check that the awning is in good condition and that the fixing material is complete.
- Make sure that the supplied fixing material (e.g. dowels) is compatible with the properties of the wall on which the awning is to be mounted.
- Pay attention to the dimensions of the awning, especially its height, so that you can mark the wall attachment correctly. Cassette awnings are usually positioned about 30 cm above the window.
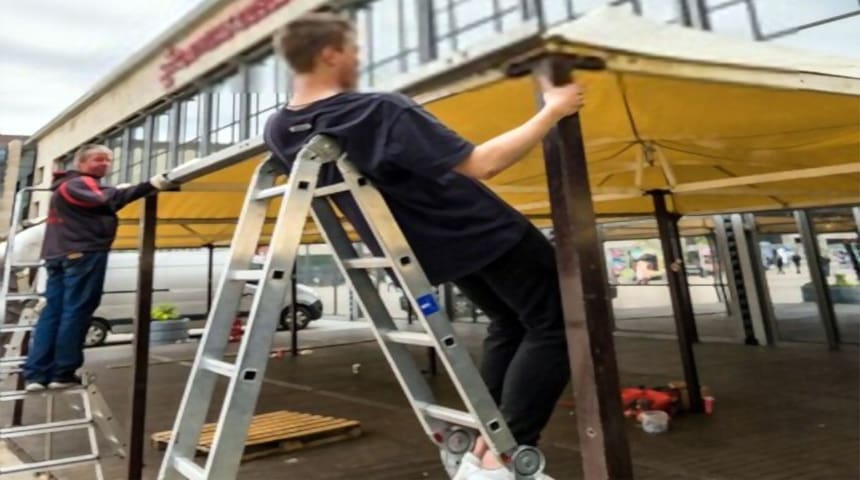
- The awning fitter must place stepladders and scaffolding in the work area and equip himself with protective equipment (goggles, protective gloves and safety shoes).
2. The awning fitter takes measurements and determines the position of the external awning.
- The awning fitter checks whether the distances between the awning brackets are sufficient so that they do not obstruct the folding arms when they are extended. He will place the two brackets on the awning (while it is on the ground) for this purpose.
- Transfer the measurements to the wall. If the awning is longer than four metres, additional brackets are required.
- The awning installer will ensure that the awning is centred over the doors.
- Mark the first mounting hole with a ruler or plumb bob and spirit level.
- The awning fitter shall draw a horizontal line to mark the last mounting hole.
3. Fixing the awning brackets to the wall.
- Once the marks have been made, the awning installer can use a hammer drill to drill holes in the wall for the dowels. The wall must be solid masonry (concrete, brick or wooden beams) and the fixing material must be suitable for the bracket (dowels and fixing anchors).
- Fix the first two brackets to the outside.
- Then fix the other brackets at the level of the previously drawn line, if this is necessary due to the length of the awning. Tighten firmly with a spanner or ratchet.
Chemical fixings: for durable fixing.
- The use of chemical anchors is a good alternative for fixing heavy loads. Before insertion, the hole must be blown out with an air compressor or a simple bicycle pump.
- The awning installer will place the cartridge in the dispensing gun. The anchor hardens as a result of the mixing of the substances as they come out of the cannula of the cartridge.
- Apply a small amount of compound to a piece of paper or cloth before filling the holes.
- Quickly insert the threaded rods through the screws to mix the agent thoroughly.
- Allow the threaded rods to protrude far enough to join the bracket, washer and nut.

Centre punching: for precise drilling.
- It often happens that the drill misses the mark when drilling and the final hole is not in the desired position.
- To avoid this, the awning installer should make a small notch in the wall with a hammer and punch to support the drill so that it does not slip during the drilling process. If your wall is uneven and made of very hard rock, drilling is not always easy!
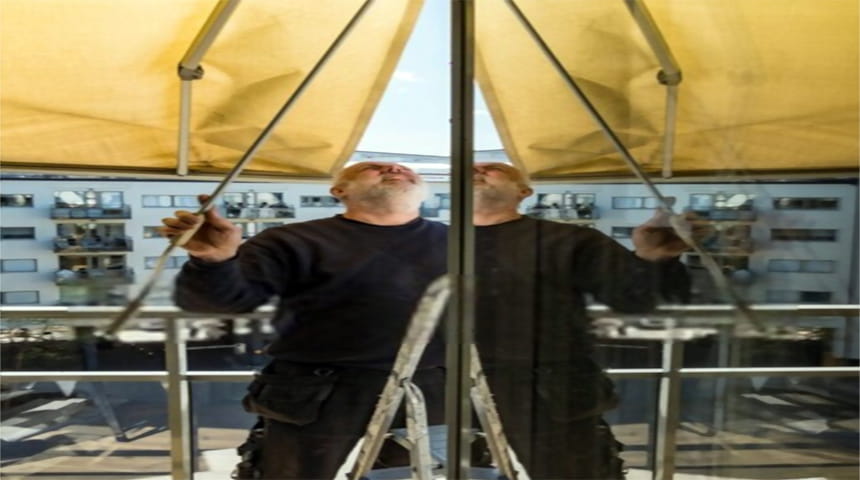
4. Fixing the canopy.
- Once the U-shaped brackets are in place, you can position the awning type centred.
- Now insert the fixing bolts and tighten them with a spanner or ratchet.
- The awning installer will adjust the inclination of the awning. Follow the manufacturer’s instructions. The angle of inclination should be 15° so that rainwater can run off easily.
- The tension of the awning is also adjusted. It must not be stretched too much or too little.
Requirements for the installation of awnings.
You must have prior knowledge.
You do not need any special prior knowledge to carry out the installation of an awning. All the awning installer needs to do is take measurements and transfer them horizontally to the wall, drill a hole in a wall with a drill and work on a ladder or scaffolding.
If your awning is electrically controlled, he must also have knowledge of electricity to be able to connect it correctly. However, this work must be carried out by a licensed electrician.
Installation time required.
About 3 hours
Number of people.
2 people.
Necessary tools and materials to be carried by an awning installer.
- Two ladders or scaffolding
- Impact drill
- Concrete drill (made of tungsten carbide)
- Suitable fixing material, e.g. heavy duty dowels or chemical dowels (with applicator gun)
- Tape measure
- Level
- Plumb line or long aluminium ruler
- Spanner
- Ratchet and inserts
- Screwdriver
- Allen spanner
- Carpenter’s pencil
- Hammer
- Awning installer’s personal protective equipment.
- Safety shoes
- Protective gloves
- Protective goggles
- Ear protection
- Work clothes
Tip.
Remember that if you are unable to do it yourself, you should always call an awning installer and put yourself in the hands of a specialist to avoid damage and future problems.